We closed on the house on April 28, 2006 (which just happened to be my birthday - pretty cool, eh?) and with that, so began construction. From the time we had first seen the house, our plan was to convert the walk-up attic into an au pair suite of sorts. For our au pair, you ask? Why, no. We don't actually have an au pair and unless I have a very rich, very old uncle I don't know about, we won't have one anytime soon. Basically, the au pair suite would act as a place a sibling or maybe an elderly parent could stay if the need arose. At 3,000 square feet, we just didn't need so much house to ourselves, and so the au pair suite was born.
On the day we closed, the attic was NOT pretty. Blue walls with some kind of cow border (yes, a cow border), hardwood floors that had been spray-painted black (yes, spray-painted black) and a crap load of old bibles. Initially, I was going to do a "before and after" post today, but the sheer amount of information involved with the attic renovation makes that unrealistic. Soooo, I figured I'd do several smaller posts, to make the story a bit easier to follow.
Basically, the attic consisted of three areas. Area 1, by which you enter the attic is now the living room. Area 2, a finished room off of Area 1 is now the bedroom and Area 3, a large, unfinished space (rafters showing, subfloor only) was divided up into the galley kitchen, bathroom and hallway.
For this post, I'm gonna concentrate on Area 3, as that is where the biggest transformation took place. For the sake of time and because this is MY blog and not my husband's blog, I'm not even gonna attempt to explain all the construction-type technicalities of the attic renovation. Instead, a bunch of pics in chronological order, together with my witty captions and pithy observations will have to suffice...


 Okay, these pics give a view into Area 3, the unfinished portion of the attic that will become the kitchen/bathroom/hallway before your very eyes! All pics show the same window, for reference. Notice the lovely cow border in pic 2.
 And in this pic, we have framing! The framing is outlining the bathroom, which will be behind the galley kitchen. The hallway is to the right.
 This is another view during framing, looking down the small hallway that leads to the bathroom. You can see that the shower is now installed. You can also see the doorway leading to the bedroom on the right.
Annnd, we're on to drywall! Exciting stuff ain't it? The kitchen is really starting to take shape now. Some lower cabinets are tentatively placed.

The cabinets are in! Some painting has been done and the floor has been laid! This view shows the storage closet at the end of the hallway. The door to the bathroom is opposite the closet.

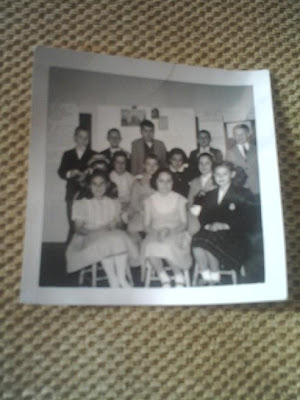
 Just for fun, here's some of the stuff we found in the attic... an old Sunday school class pic from '58 (I'll have to scan it sometime) and a couple of really old keys. Many of the doors in the house still have the old keyholes in them. I'll have to check them against the keys to see if we have any matches.
That's about it for Vol I of the Au Pair Suite series. Stay tuned for "after" pics of the kitchen, bathroom and hallway...all on tomorrow's Our Big Yellow House!
1 comment:
Cool little artifacts! You will have to preserve them as they tell part of the story of the house!! Love all the updates, keep them coming!!!!!
Post a Comment