Showing posts with label before and after. Show all posts

Sunday, September 21, 2008

The Making of an Au Pair Suite, Vol. III

This isn't exactly a perfect before and after post, as most of these pics aren't taken from the exact same angles, but you get the idea.

Here's the couch area "way before." Pretty much how it looked when we closed on the house, minus the cow border (you know that had to be the first thing to go):

And during construction, with some primer on the walls and the ceiling being scraped:

And, after:

And here's the "tv wall" during construction. It was important to use space efficiently in this small sitting area, so Mike made a built-in tv alcove above the stairs and opposite the couch:
Here's the finished tv alcove:

And a finished view of the bookcase next to the tv and the room leading into the bedroom:
The other side of the door to bedroom, in relation to the kitchen:
And a finished view of the kitchen:

So, all that's left to show of the au pair suite is the bedroom. It came out well, but not much was done in there as far as "construction." We refinished the floors, redid the ceiling and painted, but the basic shape of the room stayed the same. I will post some pics of that room in the next au pair suite installment.

Thursday, September 18, 2008

The Making of an Au Pair Suite, Vol. II

This post probably doesn't warrant a "Vol. II" designation, as it's more of a continuance of Vol. I, but what the hell...
Here are some pics that my sister's boyfriend, Nick, had on his computer. Nick tells me that when I can't think of anything to write about, I should blog about him - so I'm sure he'll be thrilled with the name-dropping...

This is the doorway looking into Area 3 of the attic before we knocked this wall down and tore out the closet (forgot to mention that yesterday). You can see the same window from yesterday's pics at the back of the unfinished room. This pic also allows for a really great view of the cow border :)

And, part of the aforementioned crap load of old bibles.

Today I went up to the attic with every intention of taking all of the "after" pics. Unfortunately, after taking just two pictures, my camera died. So, here are those two pics to hold you over til I get the rest of them posted:

Looking into the new bathroom from the hallway.


And the hallway itself. The artwork is hiding the electrical box. My sister's idea. Pretty cool, huh?

So, that's all I got before the camera died. Hopefully I'll be able to post some kitchen pics tonight.

Wednesday, September 17, 2008

The Making of an Au Pair Suite, Vol I

As I said in a previous post, I should have started this blog back in '06. I'd really like to catch everyone up on our progress thus far - which is a pretty big undertaking. Intimidating, even. (Editor's note --- This is the point at which I usually save this post as a draft and don't look at it again for a month - but NOT TODAY! Today, this post becomes a reality!) Alrighty, so, I guess the best place to start is the beginning.

We closed on the house on April 28, 2006 (which just happened to be my birthday - pretty cool, eh?) and with that, so began construction. From the time we had first seen the house, our plan was to convert the walk-up attic into an au pair suite of sorts. For our au pair, you ask? Why, no. We don't actually have an au pair and unless I have a very rich, very old uncle I don't know about, we won't have one anytime soon. Basically, the au pair suite would act as a place a sibling or maybe an elderly parent could stay if the need arose. At 3,000 square feet, we just didn't need so much house to ourselves, and so the au pair suite was born.

On the day we closed, the attic was NOT pretty. Blue walls with some kind of cow border (yes, a cow border), hardwood floors that had been spray-painted black (yes, spray-painted black) and a crap load of old bibles. Initially, I was going to do a "before and after" post today, but the sheer amount of information involved with the attic renovation makes that unrealistic. Soooo, I figured I'd do several smaller posts, to make the story a bit easier to follow.
Basically, the attic consisted of three areas. Area 1, by which you enter the attic is now the living room. Area 2, a finished room off of Area 1 is now the bedroom and Area 3, a large, unfinished space (rafters showing, subfloor only) was divided up into the galley kitchen, bathroom and hallway.
For this post, I'm gonna concentrate on Area 3, as that is where the biggest transformation took place. For the sake of time and because this is MY blog and not my husband's blog, I'm not even gonna attempt to explain all the construction-type technicalities of the attic renovation. Instead, a bunch of pics in chronological order, together with my witty captions and pithy observations will have to suffice...
Okay, these pics give a view into Area 3, the unfinished portion of the attic that will become the kitchen/bathroom/hallway before your very eyes! All pics show the same window, for reference. Notice the lovely cow border in pic 2.

And in this pic, we have framing! The framing is outlining the bathroom, which will be behind the galley kitchen. The hallway is to the right.

This is another view during framing, looking down the small hallway that leads to the bathroom. You can see that the shower is now installed. You can also see the doorway leading to the bedroom on the right.

Annnd, we're on to drywall! Exciting stuff ain't it? The kitchen is really starting to take shape now. Some lower cabinets are tentatively placed.


The cabinets are in! Some painting has been done and the floor has been laid! This view shows the storage closet at the end of the hallway. The door to the bathroom is opposite the closet.

And here's a better shot of the cabinets and floors...still a mess, but getting there.

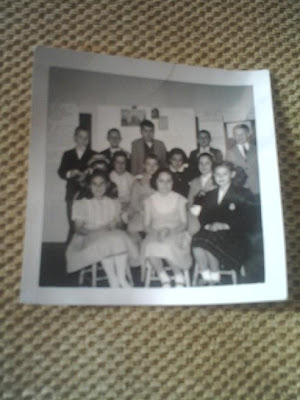
Just for fun, here's some of the stuff we found in the attic... an old Sunday school class pic from '58 (I'll have to scan it sometime) and a couple of really old keys. Many of the doors in the house still have the old keyholes in them. I'll have to check them against the keys to see if we have any matches.

That's about it for Vol I of the Au Pair Suite series. Stay tuned for "after" pics of the kitchen, bathroom and hallway...all on tomorrow's Our Big Yellow House!

Friday, August 22, 2008

Making Progress! (and getting back on topic...)

The range hood is UP! No more ugly yellow wire sticking out of the wall! I even like the backsplash, which I wasn't so sure about at first. Annnnnd, I have my pot filler in too! What a productive week. I was worried that this area would look too crowded with the pot filler AND the shelves, but I actually think it looks fine. And more importantly, its functional.

Mike only almost died twice during the whole installation! He's a good carpenter, but this stuff was all new to him. He did a great job, besides the almost dying (once by electrocution, once by chop saw). The only injury sustained was a terrible cut on one of his fingers. It was so wide it couldn't even be stitched, so we're just piling on the bacitracin at this point. Glad that's over with!

Just to remind you, this is what the range looked like sans hood and backsplash:

Such an improvement - now I can't wait to get the island going!

Thursday, June 26, 2008

Same View, Different Day

Today I thought we'd play a little game called Same View, Different Day. Or, in our case, maybe Same View, Different Year. Yeah. That works better. I am always so impressed by the before and after pictures on other house blogs. They really drive home the fact that the pretty room was not always pretty...and quite possibly the pretty room started out as a downright mess. So, without further adieu, the best of our before and afters, kitchen edition:

Before:


Annnnd After:
Although it's hard to tell, this IS the same view. The window you see in the before pic was closed up to allow for the range and range hood (not installed yet). We added a window over the new sink (for reference, you can see the floor mat in front of the sink in the after pic).

Before I get to the rest of the pics, I should add that while the kitchen is almost done and is fully functional, we still have a lot more work to tackle. Our cabinets came with a very nice crown that hasn't been installed yet...we haven't installed the range hood or range back splash yet...toe kicks are nonexistent...same goes for the under cabinet lighting...oh, and that table you see is filling in for our island, which will house the dishwasher and convection oven (that's why there are two pendant lamps over the table). And now, on to the rest of the pics...

Before:

After:
Before:
After:
Before:
After:
Before:
After:
Okay, admittedly that last one is a little bit off, but it's the only after pic of that view I had with me. What do you want for nothin? Geez. :)